Products
Where: Catalog → Products
Before you begin
- At least one category exists if you want the product browsable (see Categories).
- Attributes you want to fill in are defined, or create them from the product form with New attribute.
- Photos are added after the first save — have them ready as JPEG, PNG, GIF or WebP under 25 MB.
The product list
Go to Catalog → Products.
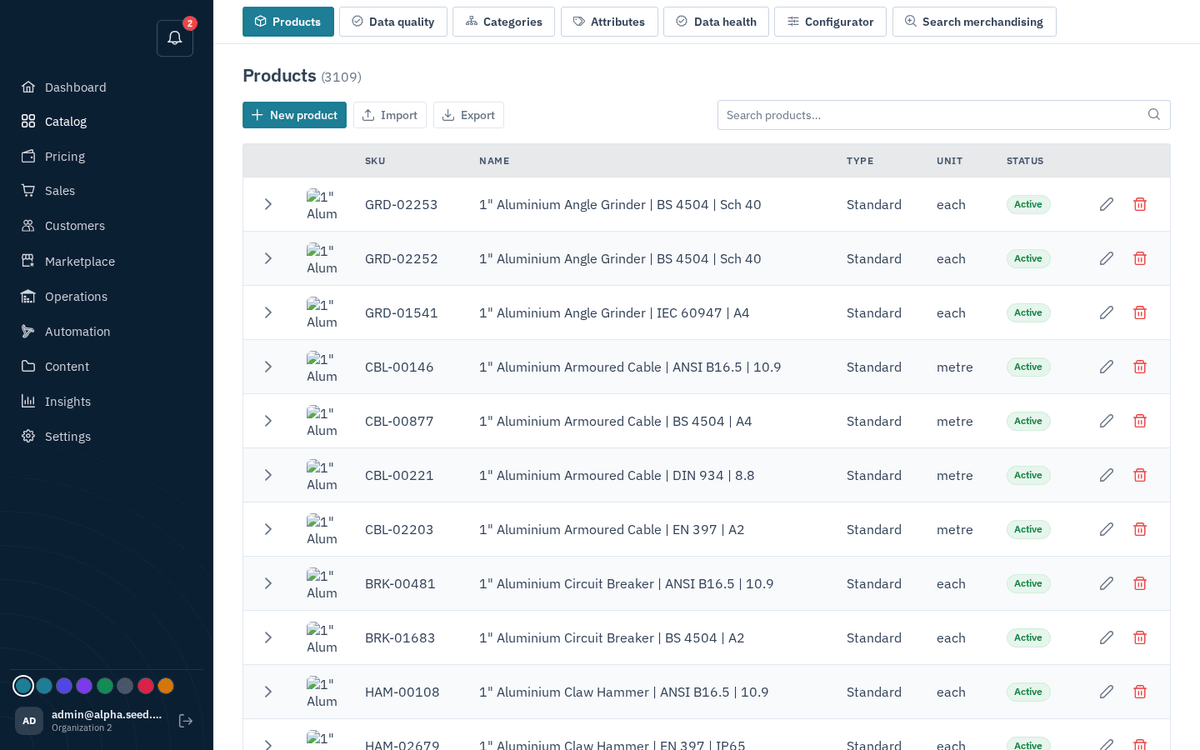
Catalog → Products — search, import/export, status tags and inline edit
- Toolbar: “New product”, “Import” (jumps to the bulk importer pre-set to products), “Export” (downloads
products.csv), and a search box (“Search products…”). The list pages on the server — 25/50/100 rows at a time — so it stays fast even with thousands of products. - Columns: an expander arrow, thumbnail, SKU, Name, Type (Standard / Has options / Bundle / kit / Digital), Unit, Status (Draft amber, Active green, Hidden grey), and pencil/trash icons.
- Click the expander to preview Description, Web address, Cost price, and the attribute chips without opening the dialog.
- Deleting a product is a soft delete with an Undo: the toast “Product deleted” names the product and offers Undo — click it to restore instantly.
The empty state reads: “No products yet — Add a product to your catalog, or import them from your ERP.”
Creating a product — every field explained
- Press “New product”. The dialog opens:
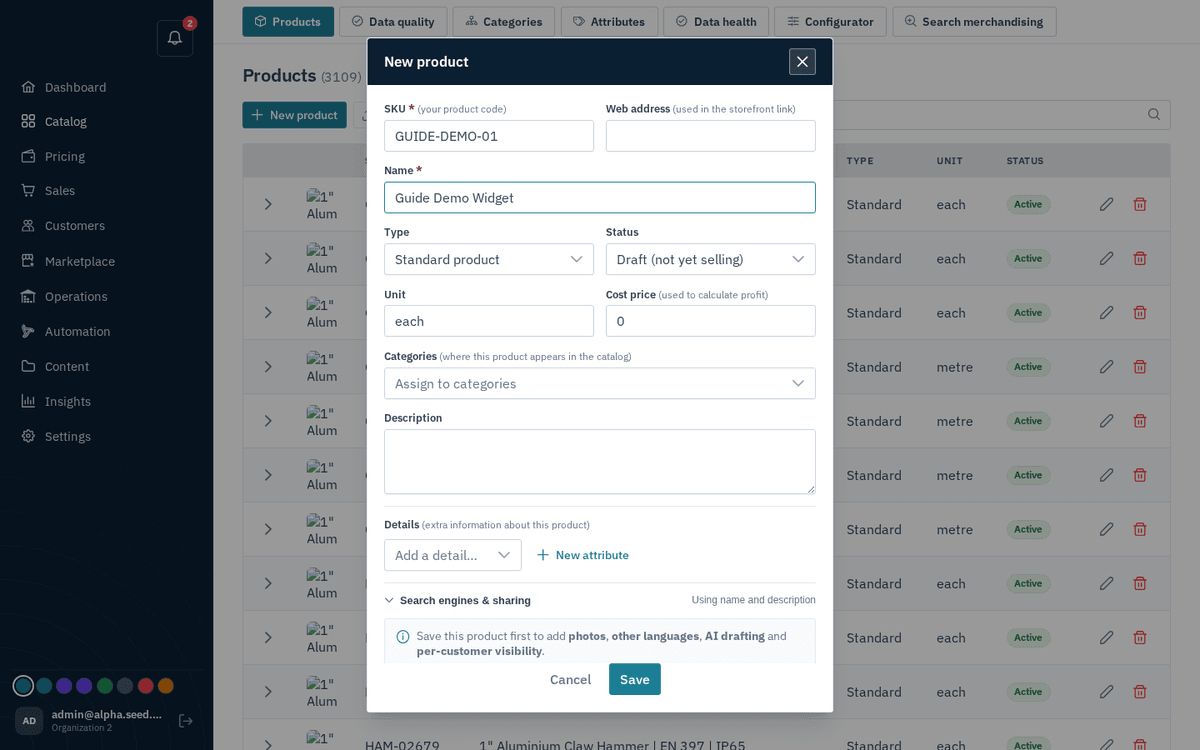
New product — SKU and Name are required; everything else can come later
- Fill in the fields. Only two are mandatory — Save stays disabled until both are filled:
| Field | Required | What it does |
|---|---|---|
| SKU | Yes | “(your product code)” — the unique code buyers and imports use |
| Name | Yes | The product’s display name |
| Web address | No | “(used in the storefront link)” — auto-generated if left blank |
| Type | No | Standard product / Has options (size, colour…) / Bundle / kit / Digital / download |
| Status | No | Draft (not yet selling) / Active (selling) / Hidden |
| Unit | No | The selling unit; defaults to each |
| Cost price | No | “(used to calculate profit)” — feeds margin reporting |
| Categories | No | “(where this product appears in the catalog)” — a multi-select; placeholder “Assign to categories” |
| Description | No | Free text shown to buyers |
| Details | No | “(extra information about this product)” — the attribute values (see below) |
-
Details (attributes). Use the “Add a detail…” dropdown to attach any defined attribute. Each type gets the right input: multi-choice attributes show a chips picker, single-choice a dropdown, yes/no a toggle, number and price a numeric input, and dates a “YYYY-MM-DD” field. If the attribute you need doesn’t exist yet, press “New attribute” and create it on the spot (Label, Code, Type, Choices; “A label is required.” if you forget the label). Until any attributes exist, the panel reads: ‘No details defined yet — create your first one with “New attribute”.’
-
Search engines & sharing. An expandable panel with a live, Google-style preview of how the product will look in search results:
- Search title — “leave empty to use the product name”; a counter warns “N / 60 characters — Google will cut this short” when you go long.
- Search description — “160 characters show in results — the rest is trimmed”.
- Preferred web address — the canonical link if this product also lives elsewhere.
- Hide from search engines — a toggle; the preview switches to “Hidden — this product won’t appear in search results”.
- Shopping results: Barcode / GTIN “(EAN, UPC)”, Manufacturer part no., and Condition (New / Refurbished / Used / Damaged / Clearance) — these feed shopping feeds such as Google Shopping.
-
Press Save. Toast: “Created” with the product name.
On a brand-new product an info strip explains: “Save this product first to add photos, other languages, AI drafting and per-customer visibility.” Those four abilities appear once the product exists — re-open it to use them.
Editing a product — photos, languages, AI drafting, visibility
Open any product row (or its pencil icon) to edit.
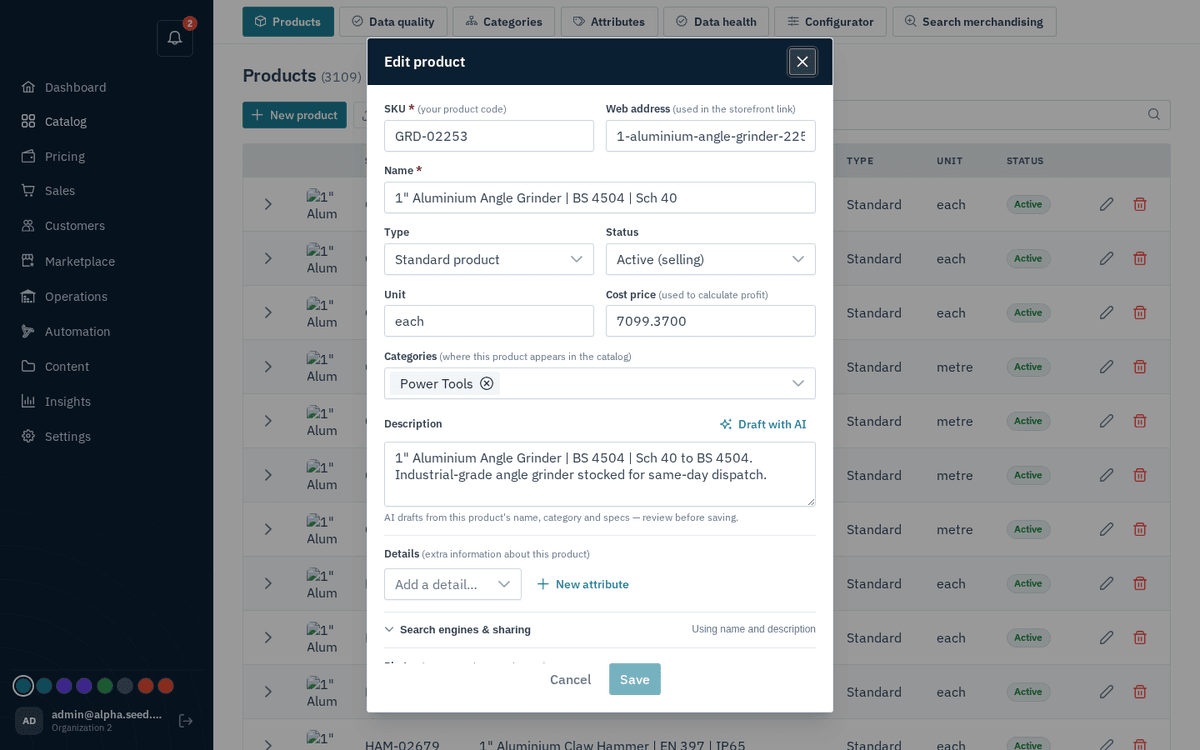
Editing a product — photos, details, languages and visibility
- Photos — “up to 5 — shown to buyers”. Press the dashed “Add photo” tile to upload (you’ll see “Uploading…” while it works); remove one with its ×. Photos are stored in your Media library (Content) and attached to the product. The empty state says “No photos yet — add up to 5.” Supported files are images (JPEG, PNG, GIF, WebP) up to 25 MB each; anything else fails with an “Upload failed” toast.
- Draft with AI — next to the Description. One click drafts a description for you; the hint explains: “AI drafts from this product’s name, category and specs — review before saving.” On success: “Draft inserted” — “Review and edit, then save.” If the AI service isn’t available you’ll see “AI draft failed” — try again later or write it by hand.
- Other languages — add a row per translation: “Language code (e.g. fr)”, “Name in that language”, “Description (optional)”, then Add (enabled once you’ve given both a language code and a name).
- Who can see this — per-customer visibility. By default the panel reads “Visible to everyone.” Use the “Hide from customer…” picker and press Hide to blocklist a customer; rules appear as “Hidden from ‹customer›”. Hidden products vanish from that buyer’s browsing, search, and product pages alike.
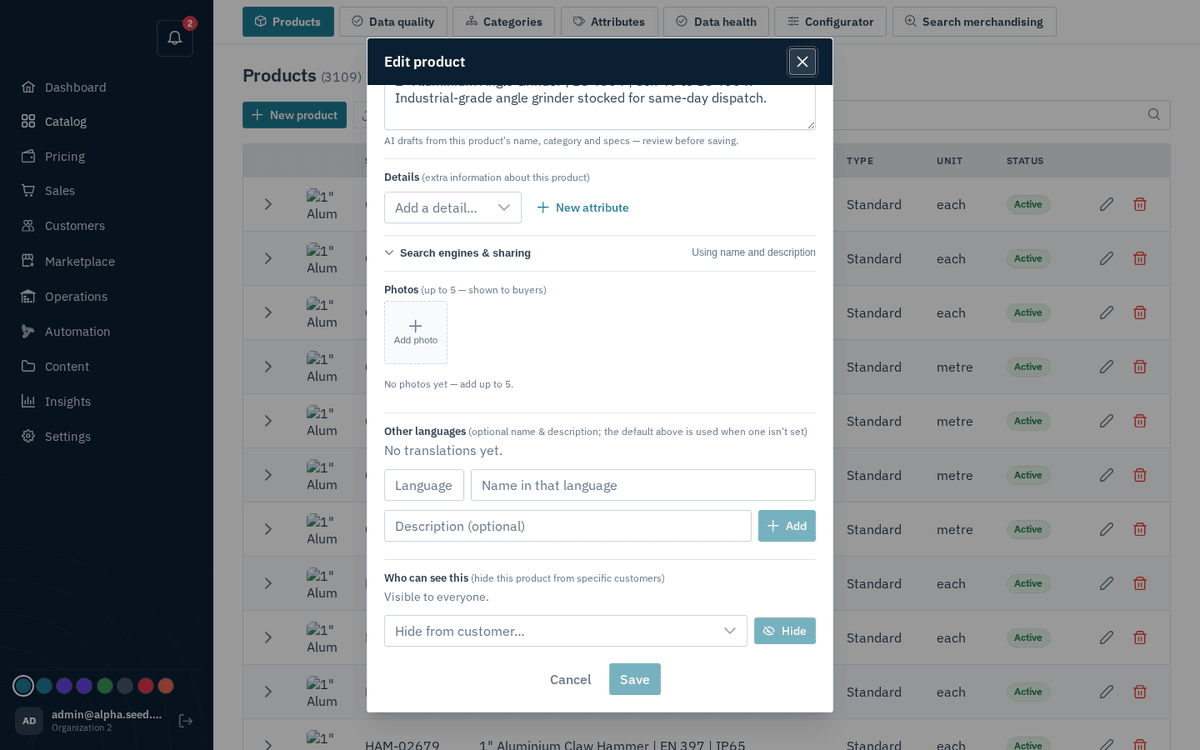
Further down the product form — search preview, shopping fields and visibility
- Variants — if a product has options (sizes, colours), a read-only panel lists them and notes: “Edit a variant by opening it from the product list.”
Saving shows “Updated”. If the product saved but a category link failed, you’ll see the warning “Saved, but categories failed” — re-open and re-assign the categories.