Automation rules
Where: Automation → Automation rules
Automation → Automation rules lists your custom rules — columns Name, “When this happens”, “Only if”, “Then”, Status — with Enable/Disable buttons per row.
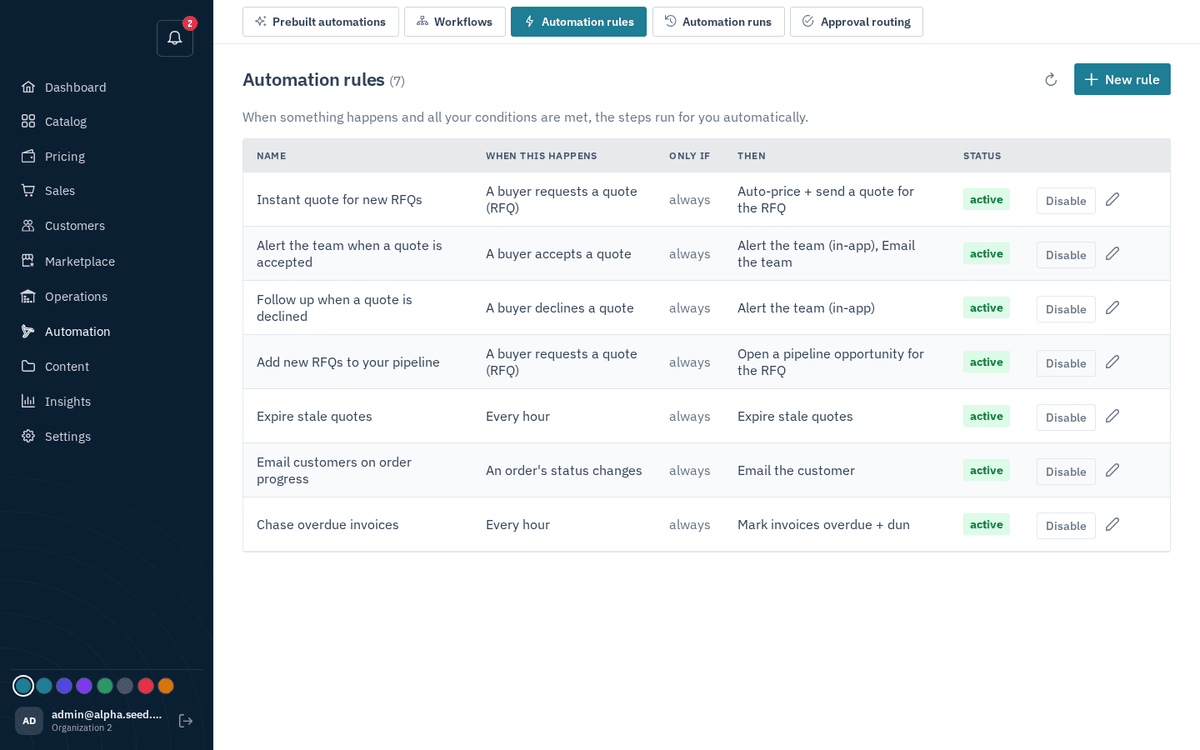
Automation → Rules — visual trigger → condition → action builder
- Press “New rule”. A visual canvas opens: a Trigger node flows into a Conditions node and then into one or more Action nodes.
- Name the rule (placeholder: “e.g. Email buyer when order ships”).
- Pick the trigger event: “An order’s status changes”, “An order is placed”, “A buyer requests a quote (RFQ)”, “A storefront visitor sends an enquiry”, “A vendor applies to sell”, “A buyer accepts a quote”, “A buyer declines a quote”, “A quote expires”, “Every hour”, or “Every day”.
- Add “only if” conditions using the operators = equals, ≠ not equals, > greater than, ≥ at least, < less than, ≤ at most (e.g. only if order total ≥ 100,000).
- Press “Add action” and pick what happens: Email the customer · Auto-price + send a quote for the RFQ · Open a pipeline opportunity for the RFQ · Alert the team (in-app) · Email the team · Expire stale quotes · Mark invoices overdue + dun · Follow up on expiring quotes · Recover abandoned carts. Each action has its own labelled parameters (e.g. “Quote valid for (days)”).
- Press Save — toast “Rule saved”.
Validation messages you might meet: “Name and trigger event are required.” · ‘Each “only if” line needs something to check.’ · “Add at least one thing to do, and pick what each one does.”