Company users and spending limits
Where: ⋯ → Team (company admins)
Open ⋯ → Team (admin only; others see “You need the company-admin role to manage users.”).
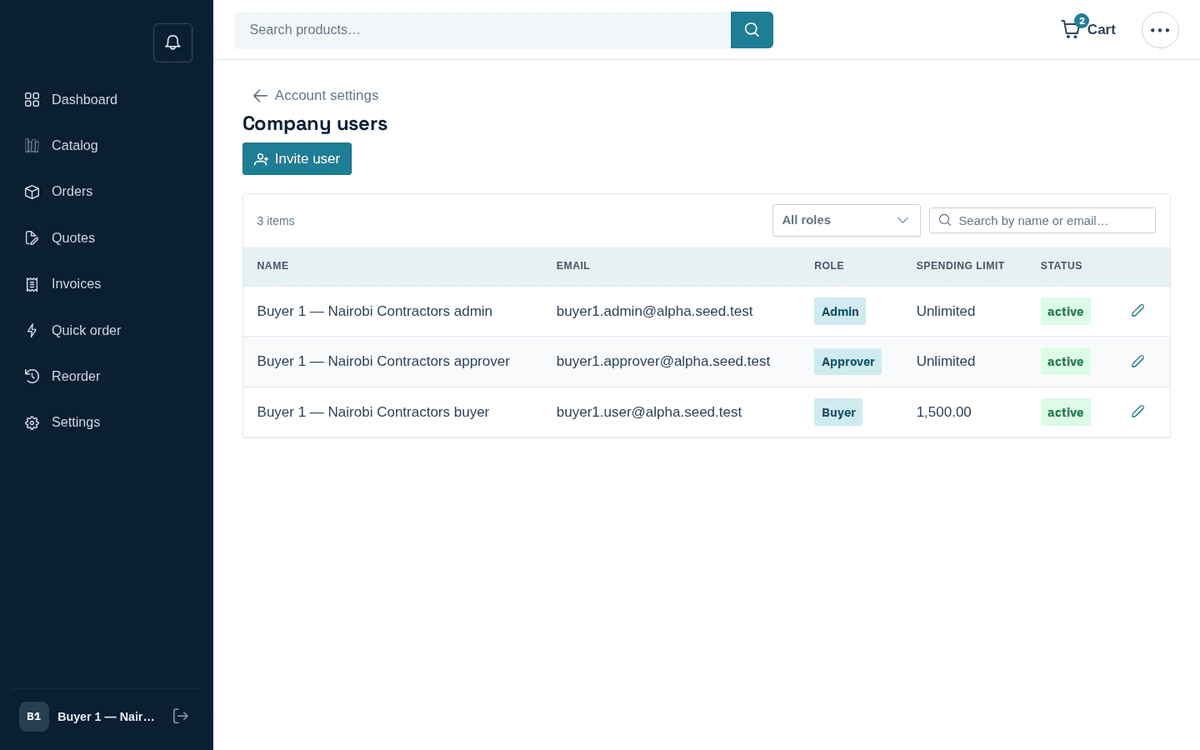
Company users — add colleagues, set roles and spending limits
The table lists every user with Name, Email, Role, Spending limit (“Unlimited” when none), and Status (active/inactive). Filter by role or search by name/email.
| Role | Can do |
|---|---|
| Buyer | Browse, buy, request quotes, see company orders/invoices — the everyday role |
| Approver | Everything a buyer can, plus release or reject held orders in Approvals |
| Admin | Everything above, plus manage users, budgets, company details and the procurement integration |
Adding a user:
- Press Invite user.
- Fill Full name, Email, a Temporary password, choose the Role (Buyer / Approver / Admin) and optionally a Spending limit (leave empty for Unlimited).
- Press Invite.
Despite the button’s name, this creates the account immediately — no invitation email is sent. Pass the temporary password to your colleague yourself (ideally through your company’s password manager) and have them change it under Settings → Security on first sign-in. Emailed join links (section Getting an account) come from the seller’s side — ask your account manager if you’d rather onboard colleagues that way.
Editing a user: click the pencil icon. In the Edit ‹name› dialog you can change the name, Role, Spending limit, and the Active toggle — switch it off to lock out a leaver without deleting their history.
“A user with this email already exists.” — the address is taken, perhaps by a deactivated account; edit that one instead. “You cannot remove your own admin access.” — a safety rail; have another admin change your role if needed.
Spending limits are per-user order caps: an order above the user’s limit goes to approval (Approvals and spending limits). They complement, not replace, budgets — limits govern who can commit how much per order, budgets govern how much in total a cost center can spend per period.